Jupyterbook
Jupyter
Overview
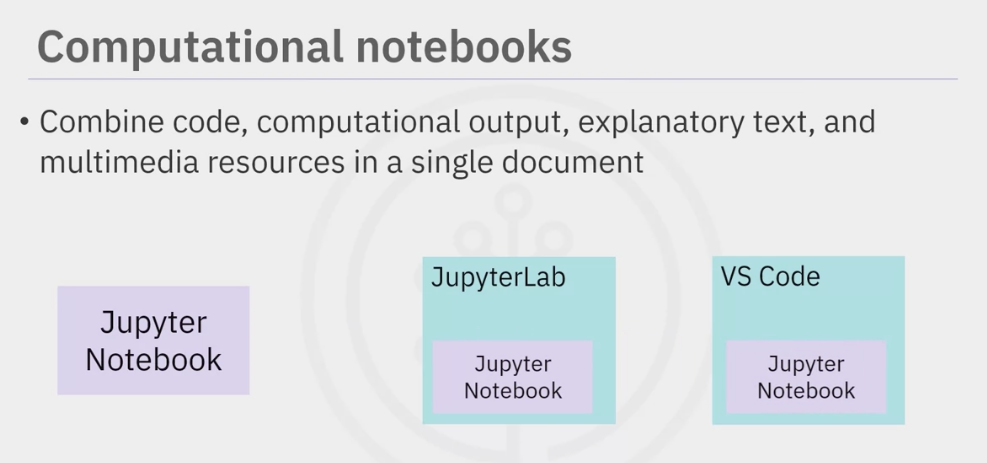
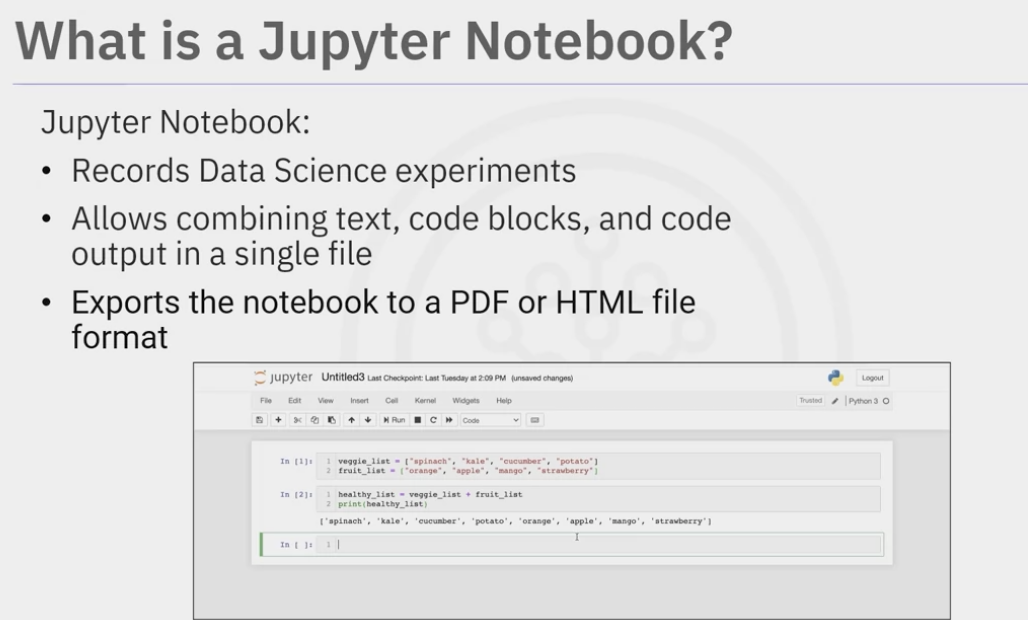
Jupyter Notebook
Record + Reuse
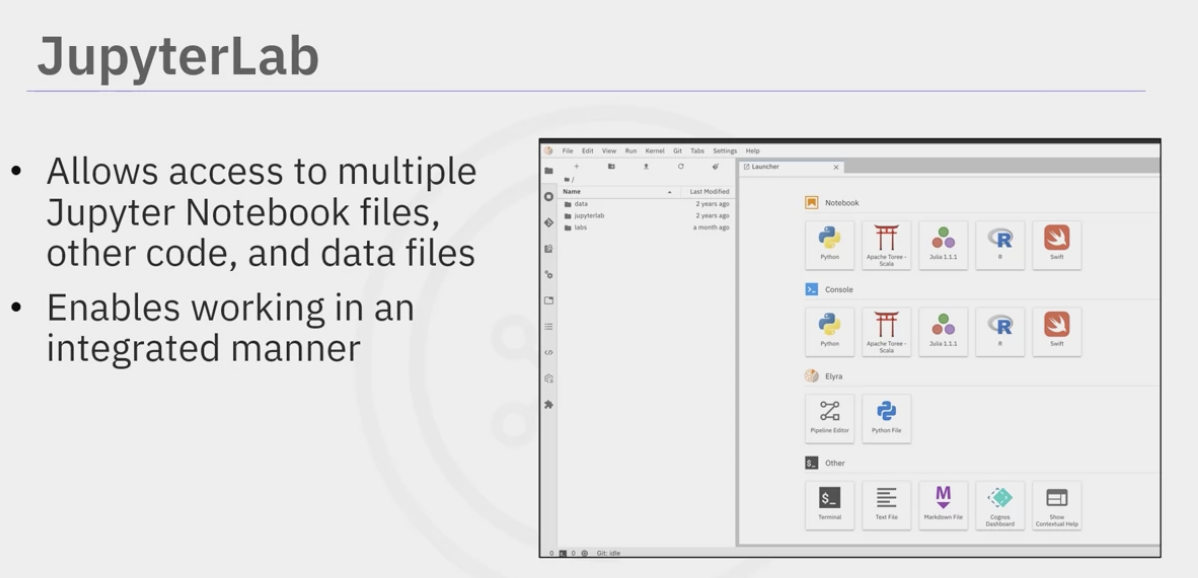
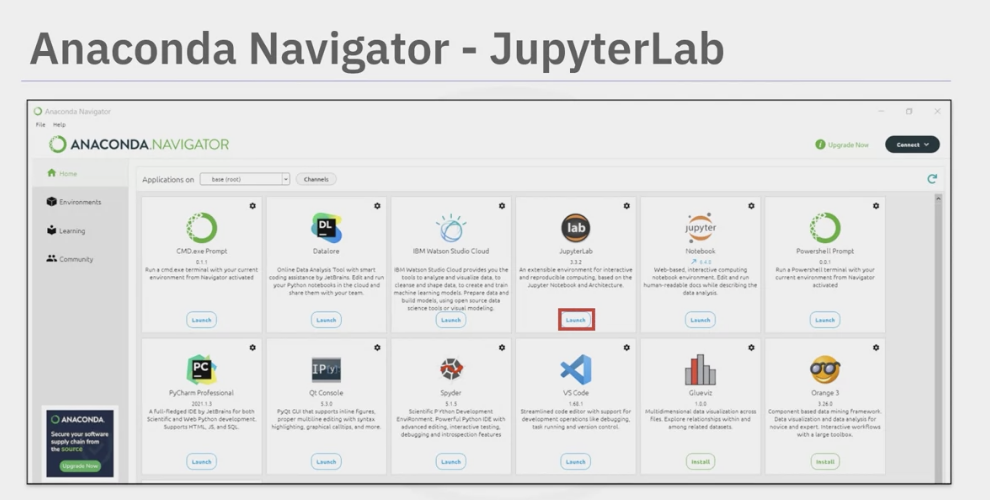
Jupyter Lab

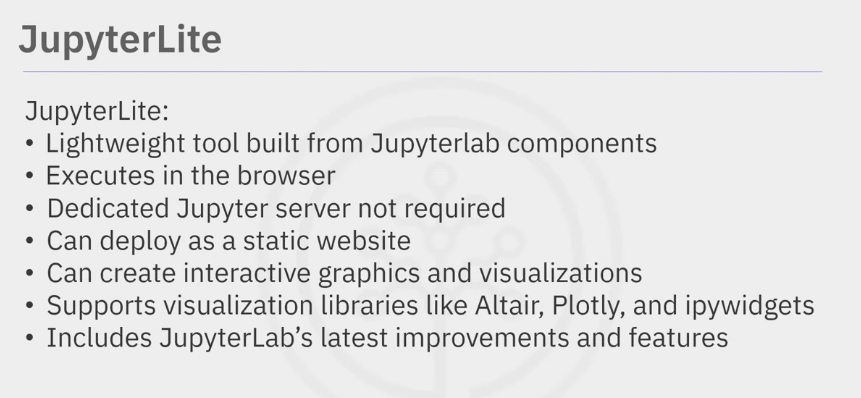
JupyterLite
jupyter.org/try-jupyter/lab
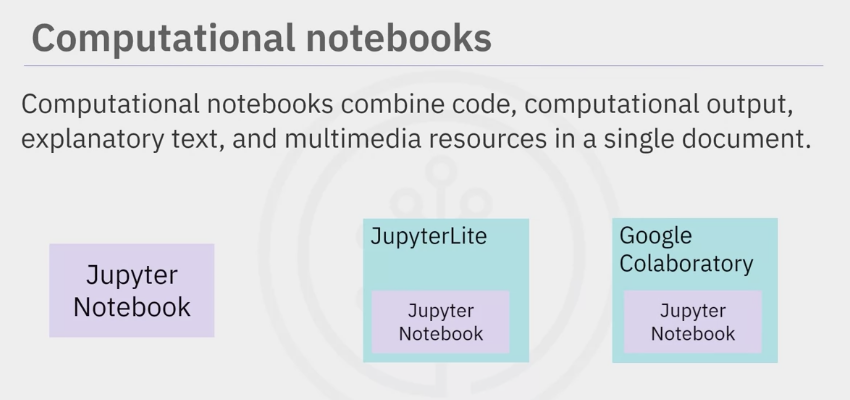

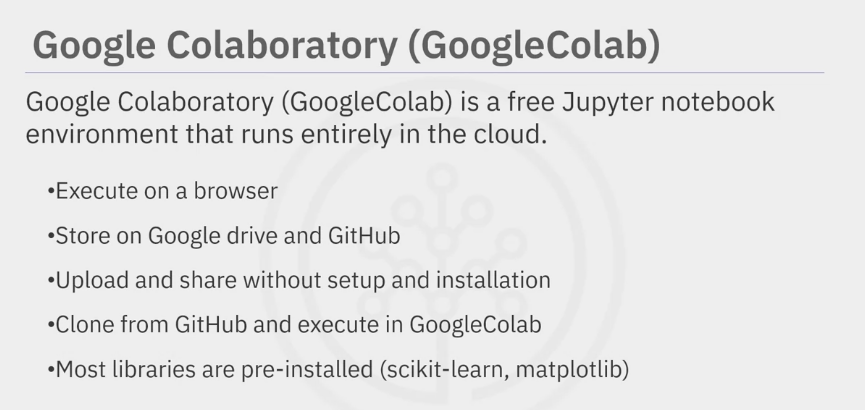
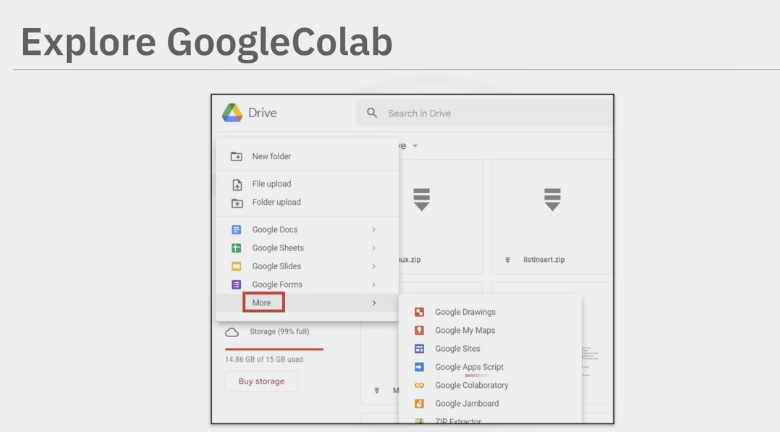
GoogleColab
Install
install Jupyter in Win
run with admin access.
- got python install.
- python automatically comes with package
PIP: allows easy installation of libraries.
- python automatically comes with package
1
$ python --version
- download Anaconda
In order to download and manage libraries, we’ll need to download a
package manager.- a set of software tools that automate complex installation processes, include downloading, upgrading, configuring, and removing software.
- most robust and common package manager for Windows is
Anaconda, which we’ll be using in this guide.
Anaconda
- free and open source package, an environment management system that makes installing software on Windows pain-free.
- a Python data science distribution. And it comes loaded with lots of useful libraries for data mining, machine learning, and statistics programming work.
- create virtual environments.
Virtual environments
- allow developers to
have separate spacefor programming projects, ensuring that the dependencies of one project don’t inadvertently affect another projects. - can prevent a lot of compilation issues.
- create a program environment for each programming project, as you can create as many as them as you like.
- allow developers to
1
2
3
4
5
6
# use Anaconda's built in virtual environment capabilities using the command line.
# create a home directory for the files
dir PY3 # new folder
cd PY3
# create a virtual environment
conda create -n py3env python=3.7.2 anaconda
download Git bash.
Git bash
works on top of the command prompt to make it easier to download libraries and easier to work with your command line as a whole.
install the package
1
2
3
4
5
6
7
8
9
10
11
# activate the Virtual environment.
$ cd PY3
$ source activate py3env
(py3env) # now in Python 3 Virtual environment.

# install the package
pip install pillow
pip install pytesseract
pip install numpy
pip install matplotlib
pip install opencv-python
install on Mac
to run the files on local computer.
- download Homebrew (package management)
1
2
3
4
5
6
# Paste that in a macOS Terminal or Linux shell prompt:
/bin/bash -c "$(curl -fsSL https://raw.githubusercontent.com/Homebrew/install/master/install.sh)"

# check install:
$ brew doctor
# you system is ready to brew.
- download python3
- homebrew will install
pipsetup toolsandwheel(all libraries and package for python) pip: assisrs Homebrew and python package management.
- homebrew will install
1
2
3
4
5
6
7
8
$ brew install python3
Warning: python 3.7.7 is already installed and up-to-date

$ brew update
Already up-to-date.

$ brew upgrade python3
Warning: python3 3.7.7 already installed
- create virtual environment
- creates a new directory inside of Py3 home folder
- houses a few files that allow our Virtual Environment to run correctly,
- isolating the project files so that they don’t mix with this system files on our computer.
- The most important of these is the live subdirectory, which starts out empty but will at the end of this lesson hold the data for all the libraries we install in this environment.
- creates a new directory inside of Py3 home folder
1
2
3
4
5
6
7
8
9
10
11
12
13
$ cd ./Documents/code
$ mkdir python3

# create virtual environment named py3env
$ python3.7 -m venv py3env

# activate it
$ source py3env/bin/activate
(py3env) J:python3 luo$  #success

# after got jupyter installed
(py3env) J:python3 luo$ Jupyter notebook
# good to go
- install the package
1
2
3
4
5
6
$ pip install pillow
$ brew install tesseract
$ pip install pytesseract
$ pip install numpy
$ pip install matplotlib
$ pip install opencv-python
- install the Jupyter Notebook
JupyterLab
- conda: conda install -c conda-forge jupyterlab
- pip: pip install jupyterlab
classic Jupyter Notebook
- conda: conda install -c conda-forge notebook
- pip:
pip install notebook
Voilà
- conda: conda install -c conda-forge voila
- pip: pip install voila
- run
jupyter notebook
Kernel


.
This post is licensed under CC BY 4.0 by the author.
Comments powered by Disqus.