GCP - LABs
- Fundamental Lab 1
- lab1 - Google Cloud Fundamentals: Cloud Marketplace
- lab2 - Google Cloud Fundamentals: Compute Engine
- lab3 - Google Cloud Fundamentals: Cloud Storage and Cloud SQL
- Task 1: Sign in to the Google Cloud Platform (GCP) Console
- Task 2: Deploy a web server VM instance
- Task 3: Create a Cloud Storage bucket using the gsutil command line
- Task 4: Create the Cloud SQL instance
- Task 5: Configure an application in a Compute Engine instance to use Cloud SQL
- Task 6: Configure an application in a Compute Engine instance to use a Cloud Storage object
- lab4 - Google Cloud Fundamentals: GKE
- lab5 - Google Cloud Fundamentals: App Engine
- Set up your lab environment
- lab6 - Google Cloud Fundamentals: Deployment Manager and Cloud Monitoring
- Create a Monitoring workspace
- lab7 - Google Cloud Fundamentals: BigQuery
- Kubernetes Lab
- lab1 - Accessing the Google Cloud Console and Cloud Shell
- Task 0. Lab Setup
- Task 1. Explore the Google Cloud Console
- Cloud Storage: create a bucket
- Create a virtual machine (VM) instance
- Explore the VM details
- Create an IAM service account
- Task 2. Explore Cloud Shell
- Open Cloud Shell and explore its features
- Use Cloud Shell to set up the environment variables
- Move the credentials file into Cloud Shell
- Create a second Cloud Storage bucket
- Use the gcloud command line to create a second virtual machine
- create a second service account
- Task 3. Work with Cloud Storage in Cloud Shell
- Download a file to Cloud Shell and copy it to Cloud Storage
- Set the access control list for a Cloud Storage object
- Authenticate as a service account in Cloud Shell
- Task 4. Explore the Cloud Shell code editor
- Open the Cloud Shell code editor
- lab2 - Working with Cloud Build
- lab1 - Accessing the Google Cloud Console and Cloud Shell
Fundamental Lab 1
Lab for Google Cloud Platform Fundamentals: Core Infrastructure
lab1 - Google Cloud Fundamentals: Cloud Marketplace
use Cloud Marketplace to quickly and easily deploy a LAMP stack on a Compute Engine instance.
- The Bitnami LAMP Stack provides a complete web development environment for Linux that can be launched in one click.
| Component | Role |
| Linux | Operating system |
| Apache HTTP Server | Web server |
| MySQL | Relational database |
| PHP | Web application framework |
| phpMyAdmin | PHP administration tool |
Bitnami LAMP Stack Documentation.
Task 1: Sign in to the Google Cloud Platform (GCP) Console
Task 2: Use Cloud Marketplace to deploy a LAMP stack
GCP Console > Navigation menu > Marketplace.
- In the search bar
- type and click LAMP Certified by Bitnami.
- On the LAMP page, click Launch.
Leave the remaining settings as their defaults.
- Click Deploy.
Task 3: Verify your deployment
When the deployment is complete, click the Site address link in the right pane.
On the GCP Console, under Get started with LAMP Certified by Bitnami, click SSH.
- a secure login shell session on your virtual machine appears.
1
2
3
4
5
6
7
8
9
10
11
12
# change the current working directory to `/opt/bitnami`, execute the following command:
cd /opt/bitnami


# To copy the `phpinfo.php` script from the installation directory to a publicly accessible location under the web server document root
sudo sh -c 'echo "<?php phpinfo(); ?>" > apache2/htdocs/phpinfo.php'

# The phpinfo.php script displays your PHP configuration.
# It is often used to verify a new PHP installation.

# close the SSH window
exit
- Open a new browser tab.
https://SITE_ADDRESS/phpinfo.php- A summary of the PHP configuration of your server is displayed.
- Close the phpinfo tab.
lab2 - Google Cloud Fundamentals: Compute Engine
perform the following tasks:
Create a Compute Engine virtual machine using the Google Cloud Platform (GCP) Console.
Create a Compute Engine virtual machine using the gcloud command-line interface.
Connect between the two instances.
Task 1: Sign in to the Google Cloud Platform (GCP) Console
Task 2: Create a virtual machine using the GCP Console
- In the Navigation menu > Compute Engine > VM instances.
- Click Create.
- On the Create an Instance page
- for Name, type
my-vm-1 - For Region and Zone, select the region and zone assigned by Qwiklabs.
- For Machine type, accept the default.
- For Boot disk, if the Image shown is not Debian GNU/Linux 9 (stretch), click Change and select Debian GNU/Linux 9 (stretch).
- Leave the defaults for Identity and API access unmodified.
- For Firewall, click Allow HTTP traffic.
- Leave all other defaults unmodified.
- To create and launch the VM, click Create.
Task 3: Create a virtual machine using the gcloud command line
- In GCP console, on the top right toolbar, click the Open Cloud Shell button > Continue
1
2
3
4
5
6
7
8
9
10
11
12
13
14
15
16
17
18
19
20
21
22
23
24
25
# display a list of all the zones in the region to which Qwiklabs assigned you
gcloud compute zones list | grep us-central1
# us-central1-c  us-central1  UP
# us-central1-a  us-central1  UP
# us-central1-f  us-central1  UP
# us-central1-b  us-central1  UP

# Choose a zone from that list other than the zone to which Qwiklabs assigned you. For example, if Qwiklabs assigned you to region `us-central1` and zone `us-central1-a` you might choose zone `us-central1-b`.

# To set your default zone to the one you just chose, enter this partial command `gcloud config set compute/zone` followed by the zone you chose.
gcloud config set compute/zone us-central1-b


# To create a VM instance called **my-vm-2** in that zone, execute this command:

gcloud compute instances create "my-vm-2"
  --machine-type "n1-standard-1"
  --image-project "debian-cloud"
  --image "debian-9-stretch-v20190213"
  --subnet "default"
# NAME ZONE   MACHINE_TYPE PREEMPTIBLE  INTERNAL_IP  EXTERNAL_IP  STATUS
# my-vm-2  us-central1-b  n1-standard-1   10.128.0.3 35.184.46.186  RUNNING

# To close the Cloud Shell, execute the following command:
exit
Task 4: Connect between VM instances
- In the Navigation menu > Compute Engine > VM instances.
- two VM instances in a different zone.
- Notice that the Internal IP addresses of these two instances share the first three bytes in common.
- They reside on the same subnet in their Google Cloud VPC even though they are in different zones.
- To open a command prompt on the my-vm-2 instance, click SSH in its row in the VM instances list.
1
2
3
4
5
6
7
8
9
10
11
12
13
14
15
16
17
18
19
20
21
22
23
24
25
26
27
28
29
30
31
32
33

# confirm that **my-vm-2** can reach **my-vm-1** over the network:
ping my-vm-1.us-central1-a
# the complete hostname of **my-vm-1** is **my-vm-1.us-central1-a.c.PROJECT_ID.internal**, where PROJECT_ID is the name of your Google Cloud Platform project. GCP automatically supplies Domain Name Service (DNS) resolution for the internal IP addresses of VM instances.

# Use the **ssh** command to open a command prompt on **my-vm-1**:
ssh my-vm-1.us-central1-a

# install the Nginx web server:
sudo apt-get install nginx-light -y


# add a custom message to the home page of the web server:
sudo nano /var/www/html/index.nginx-debian.html


# below the `h1` header. Add text like this, and replace YOUR_NAME with your name:
Hi from YOUR_NAME
# Press **Ctrl+O** and then press **Enter** to save your edited file, and then press **Ctrl+X** to exit the nano text editor.

# Confirm that the web server is serving your new page.
# At the command prompt on **my-vm-1**, execute this command:
curl https://localhost/

# exit the command prompt on **my-vm-1**, execute this command:
exit


# return to the command prompt on **my-vm-2**


# confirm that **my-vm-2** can reach the web server on **my-vm-1**, at the command prompt on **my-vm-2**, execute this command:
curl https://my-vm-1.us-central1-a/
In the Navigation menu > Compute Engine > VM instances.
Copy the External IP address for my-vm-1 and paste it into the address bar of a new browser tab. You will see your web server’s home page, including your custom text.
- If you forgot to click Allow HTTP traffic when you created the my-vm-1 VM instance, your attempt to reach your web server’s home page will fail. You can add a firewall rule to allow inbound traffic to your instances, although this topic is out of scope for this course.
lab3 - Google Cloud Fundamentals: Cloud Storage and Cloud SQL
Create a Cloud Storage bucket and place an image into it.
configure an application running in Compute Engine to use a database managed by Cloud SQL.
configure a web server with PHP, a web development environment that is the basis for popular blogging softwar, Connect to the Cloud SQL instance from a web server.
Use the image in the Cloud Storage bucket on a web page.
Task 1: Sign in to the Google Cloud Platform (GCP) Console
Task 2: Deploy a web server VM instance
GCP Console > Navigation menu > Compute Engine > VM instances.
Click Create.
On the Create an Instance page,
- for Name, type
bloghost - For Region and Zone, select the region and zone assigned by Qwiklabs.
- For Machine type, accept the default.
- For Boot disk, if the Image shown is not Debian GNU/Linux 9 (stretch), click Change and select Debian GNU/Linux 9 (stretch).
- Leave the defaults for Identity and API access unmodified.
- For Firewall, click Allow HTTP traffic.
- Click Management, security, disks, networking, sole tenancy to open that section of the dialog.
- Enter the following script as the value for Startup script:
- for Name, type
1
2
3
apt-get update
apt-get install apache2 php php-mysql -y
service apache2 restart
Leave the remaining settings as their defaults, and click Create.
On the VM instances page, copy the bloghost VM instance’s internal and external IP addresses:
- Internal IP 10.128.0.2 (nic0)
- External IP 35.232.96.34
Task 3: Create a Cloud Storage bucket using the gsutil command line
All Cloud Storage bucket names must be globally unique.
- To ensure that your bucket name is unique, these instructions will guide you to give your bucket the same name as your Cloud Platform project ID, which is also globally unique.
- Cloud Storage buckets can be associated with either a region or a multi-region location: US, EU, or ASIA.
- In this activity, you associate your bucket with the multi-region closest to the region and zone that Qwiklabs or your instructor assigned you to.
- On the Google Cloud Platform menu, click Activate Cloud Shell
. If a dialog box appears, click Start Cloud Shell.
1
2
3
4
5
6
7
8
9
10
11
12
13
14
15
16
17
18
19
20
21
22
23
24
25
# enter your chosen location into an environment variable called LOCATION. Enter one of these commands:
export LOCATION=US
# export LOCATION=EU
# export LOCATION=ASIA


# In Cloud Shell, the DEVSHELL_PROJECT_ID environment variable contains your project ID.
echo $$DEVSHELL_PROJECT_ID


# to make a bucket named after your project ID:
gsutil mb -l $LOCATION gs://$DEVSHELL_PROJECT_ID
# Creating gs://qwiklabs-gcp-00-9740a5240906/...


# Retrieve a banner image from a publicly accessible Cloud Storage location:
gsutil cp gs://cloud-training/gcpfci/my-excellent-blog.png my-excellent-blog.png


# Copy the banner image to your newly created Cloud Storage bucket:
gsutil cp my-excellent-blog.png gs://$DEVSHELL_PROJECT_ID/my-excellent-blog.png


# Modify the Access Control List of the object you just created so that it is readable by everyone:
gsutil acl ch -u allUsers:R gs://$DEVSHELL_PROJECT_ID/my-excellent-blog.png
Task 4: Create the Cloud SQL instance
GCP Console > Navigation menu > SQL.
- Click Create instance.
- For Choose a database engine, select MySQL.
- For Instance ID, type blog-db,
- for Root password type a password of your choice.
root - Set the region and zone assigned by Qwiklabs.
- same region and zone into which you launched the bloghost instance.
- The best performance is achieved by placing the client and the database close to each other.
Click Create.
Click on the name of the instance, blog-db, to open its details page.
- From the SQL instances details page
- the Public IP address for your SQL instance:
34.69.146.67
- the Public IP address for your SQL instance:
Click on Users menu on the left-hand side, click ADD USER ACCOUNT.
For User name, type
blogdbuserFor Password, type a password of your choice.
dbuserClick ADD to add the user account in the database.
- Click the Connections tab
- click Add network.
- If you are offered the choice between a Private IP connection and a Public IP connection, choose Public IP for purposes of this lab.
For Name, type
web front end- For Network, type the external IP address of your bloghost VM instance, followed by
/3235.232.96.34/32- Be sure to use the external IP address of your VM instance followed by
/32. - Do not use the VM instance’s internal IP address.
- Do not use the sample IP address shown here.
Click Done to finish defining the authorized network.
- Click Save to save the configuration change.
Task 5: Configure an application in a Compute Engine instance to use Cloud SQL
On the Navigation menu > Compute Engine > VM instances.
In the VM instances list, click SSH in the row for your VM instance bloghost.
1
2
3
4
5
6
7
8
9
10
11
12
13
14
15
16
17
18
19
20
21
22
23
24
25
26
27
28
29
30
31
32
33
34
35
36
37
38
39
40
41
42
43
44
45
46
47
48
49
50
51
52
53
54
55
56
57
58
59
60
61
62
63
64
65
66
67
68
69
70
71
72
# In your ssh session on **bloghost**

# change your working directory to the document root of the web server:
cd /var/www/html


# Use the **nano** text editor to edit a file called **index.php**:
sudo nano index.php


# Paste the content below into the file:
# <html>
# <head><title>Welcome to my excellent blog</title></head>
# <body>
# <h1>Welcome to my excellent blog</h1>
# <?php
#  $dbserver = "CLOUDSQLIP";
# $dbuser = "blogdbuser";
# $dbpassword = "DBPASSWORD";
# // In a production blog, we would not store the MySQL
# // password in the document root. Instead, we would store it in a
# // configuration file elsewhere on the web server VM instance.

# $conn = new mysqli($dbserver, $dbuser, $dbpassword);

# if (mysqli_connect_error()) {
# echo ("Database connection failed: " . mysqli_connect_error());
# } else {
# echo ("Database connection succeeded.");
# }
# ?>
# </body></html>
# Press **Ctrl+O**, and then press **Enter** to save your edited file.
# Press **Ctrl+X** to exit the nano text editor.


# In a later step, you will insert your Cloud SQL instance's IP address and your database password into this file.

# Restart the web server:
sudo service apache2 restart


# Open a new web browser tab and paste into the address bar your **bloghost** VM instance's external IP address followed by **/index.php**.
# The URL will look like this:
35.232.96.34/index.php
# Be sure to use the external IP address of your VM instance followed by /index.php.
# Do not use the VM instance's internal IP address. Do not use the sample IP address shown here.


# When you load the page, you will see that its content includes an error message beginning with the words:
Database connection failed: php_network_getaddresses: getaddrinfo failed: Name or service not known
# This message occurs because you have not yet configured PHP's connection to your Cloud SQL instance.


# Return to your ssh session on **bloghost**. Use the **nano** text editor to edit **index.php** again.
sudo nano index.php


# replace `CLOUDSQLIP` with the Cloud SQL instance Public IP address 34.69.146.67

# replace `DBPASSWORD` with the Cloud SQL database password that you defined above. Leave the quotation marks around the value in place.

# Press **Ctrl+O**, and then press **Enter** to save your edited file.

# Press **Ctrl+X** to exit the nano text editor.

# Restart the web server:
sudo service apache2 restart


# Return to the web browser tab in which you opened your **bloghost** VM instance's external IP address. When you load the page, the following message appears:
Database connection succeeded.

In an actual blog, the database connection status would not be visible to blog visitors. Instead, the database connection would be managed solely by the administrator.
Task 6: Configure an application in a Compute Engine instance to use a Cloud Storage object
In the GCP Console, click Storage > Browser.
Click on the bucket that is named after your GCP project.
- In this bucket, there is an object called my-excellent-blog.png.
- Copy the URL behind the link icon that appears in that object’s Public access column, or behind the words “Public link” if shown.
- Return to your ssh session on your bloghost VM instance.
1
2
3
4
5
6
7
8
9
10
11
12
13
14
15
16
17
18
19
20
21
# set your working directory to the document root of the web server:
cd /var/www/html


# Use the **nano** text editor to edit **index.php**:
sudo nano index.php


# Use the arrow keys to move the cursor to the line that contains the **h1** element. Press **Enter** to open up a new, blank screen line, and then paste the URL you copied earlier into the line.

# Paste this HTML markup immediately before the URL:
<img src='https://storage.googleapis.com/qwiklabs-gcp-00-9740a5240906/my-excellent-blog.png'>

# The effect of these steps is to place the line containing `<img src='...'>` immediately before the line containing `<h1>...</h1>`

# Press **Ctrl+O**, and then press **Enter** to save your edited file.
# Press **Ctrl+X** to exit the nano text editor.


# Restart the web server:
sudo service apache2 restart
- Return to the web browser tab in which you opened your bloghost VM instance’s external IP address. When you load the page, its content now includes a banner image. 35.232.96.34/index.php
lab4 - Google Cloud Fundamentals: GKE
- Provision a Kubernetes cluster using Kubernetes Engine., which containing several containers,
- Deploy and manage Docker containers using
kubectl. - each containing a web server.
- place a load balancer in front of the cluster and view its contents.
Task 1: Sign in to the Google Cloud Platform (GCP) Console
Task 2: Confirm that needed APIs are enabled
GCP Console > Navigation menu > APIs & Services.
confirm that both of these APIs are enabled:
- Kubernetes Engine API
- Container Registry API
If either API is missing, click Enable APIs and Services at the top. Search for the above APIs by name and enable each for your current project. (You noted the name of your GCP project above.)
Task 3: Start a Kubernetes Engine cluster
- In GCP console, Open Cloud Shell button.
1
2
3
4
5
6
7
8
9
10
11
12
13
# place the zone that Qwiklabs assigned you to into an environment variable called MY\_ZONE.
export MY_ZONE=us-central1-a

# Start a Kubernetes cluster managed by Kubernetes Engine.
# Name the cluster **webfrontend** and configure it to run 2 nodes:
# The `gcloud container clusters create` command automatically authenticated `kubectl` for you
gcloud container clusters create webfrontend \
  --zone $MY_ZONE \

# check your installed version of Kubernetes using the `kubectl version` command:
kubectl version
# Client Version: version.Info{Major:"1", Minor:"20", GitVersion:"v1.20.2", GitCommit:"faecb196815e248d3ecfb03c680a4507229c2a56", GitTreeState:"clean", BuildDate:"2021-01-13T13:28:09Z", GoVersion:"go1.15.5", Compiler:"gc", Platform:"linux/amd64"}
# Server Version: version.Info{Major:"1", Minor:"17+", GitVersion:"v1.17.14-gke.1600", GitCommit:"7c407f5cc8632f9af5a2657f220963aa7f1c46e7", GitTreeState:"clean", BuildDate:"2020-12-07T09:22:27Z", GoVersion:"go1.13.15b4", Compiler:"gc", Platform:"linux/amd64"}
- View your running nodes in the GCP Console.
- On the Navigation menu > Compute Engine > VM Instances
- Your Kubernetes cluster is now ready for use.
Task 4: Run and deploy a container
- From your Cloud Shell prompt
1
2
3
4
5
6
7
8
9
10
11
12
13
14
15
16
17
18
19
20
21
22
23
24
25
26
27
28
29
30
31
32
33
34
35
36
37
38
39
40
41
42
43
44
45
46

# launch a single instance of the nginx container. (Nginx is a popular web server.)
kubectl create deploy nginx --image=nginx:1.17.10

# In Kubernetes, all containers run in pods.
# `kubectl create` command caused Kubernetes to create a deployment consisting of a single pod containing the nginx container.
# A Kubernetes deployment keeps a given number of pods up and running even in the event of failures among the nodes on which they run.
# In this command, you launched the default number of pods, which is 1.


# View the pod running the nginx container:
kubectl get pods


# Expose the nginx container to the Internet:
kubectl expose deployment nginx \
  --port 80 \
  --type LoadBalancer
# Kubernetes created a service and an external load balancer with a public IP address attached to it.
# The IP address remains the same for the life of the service.
# Any network traffic to that public IP address is routed to pods behind the service: in this case, the nginx pod.


# View the new service:
kubectl get services
# NAME   TYPE     CLUSTER-IP   EXTERNAL-IP  PORT(S)    AGE
# kubernetes ClusterIP  10.51.240.1  <none>   443/TCP    2m56s
# nginx    LoadBalancer 10.51.240.74 35.238.104.4 80:32037/TCP 72s

# use the displayed cluster external IP address to test and contact the nginx container remotely.
# The default home page of the Nginx browser is displayed.


# Scale up the number of pods running on your service:
kubectl scale deployment nginx \
  --replicas 3

# Confirm that Kubernetes has updated the number of pods:
kubectl get pods
# NAME       READY STATUS      RESTARTS AGE
# nginx-5df596bbf9-f44rf 1/1   Running     0    4s
# nginx-5df596bbf9-jv5tl 0/1   ContainerCreating 0    4s
# nginx-5df596bbf9-lw72z 1/1   Running     0    65s

# Confirm that your external IP address has not changed:
kubectl get services
- Return to the web browser tab in which you viewed your cluster’s external IP address. Refresh the page to confirm that the nginx web server is still responding.


lab5 - Google Cloud Fundamentals: App Engine
- create and deploy a simple App Engine application using a virtual environment in the Google Cloud Shell.
- Initialize App Engine.
- Preview an App Engine application running locally in Cloud Shell.
- Deploy an App Engine application, so that others can reach it.
- Disable an App Engine application, when you no longer want it to be visible.
Set up your lab environment
Google Cloud Shell is a virtual machine that is loaded with development tools. It offers a persistent 5GB home directory and runs on the Google Cloud. Google Cloud Shell provides command-line access to your GCP resources.
- In GCP console > Open Cloud Shell button
1
2
3
4
5
6
7
8
9
10
11
12
13
14
15
# **gcloud** is the command-line tool for Google Cloud Platform.
# It comes pre-installed on Cloud Shell and supports tab-completion.

# You can list the active account name with this command:
gcloud auth list
# Credentialed Accounts
# ACTIVE  ACCOUNT
# *   student-01-6fde9fef7b3f@qwiklabs.net


# list the project ID with this command:
gcloud config list project
# [core]
# project = qwiklabs-gcp-01-6b2d0e98cfd3
# Your active configuration is: [cloudshell-21125]
Task 1: Initialize App Engine
1
2
3
4
5
6
7
8
9
10
# 1. Initialize your App Engine app with your project and choose its region:
gcloud app create \
    --project=$DEVSHELL_PROJECT_ID

# 2. Clone the source code repository for a sample application in the **hello\_world** directory:
git clone https://github.com/GoogleCloudPlatform/python-docs-samples


# 3. Navigate to the source directory:
cd python-docs-samples/appengine/standard_python3/hello_world
Task 2: Run Hello World application locally
- run the Hello World application in a local, virtual environment in Cloud Shell.
1
2
3
4
5
6
7
8
9
10
11
12
13
14
15
16
17
# Cloud Shell command prompt.

# 1. Execute the following command to download and update the packages list.
sudo apt-get update -y

# 2. Set up a virtual environment in which you will run your application. Python virtual environments are used to isolate package installations from the system.
sudo apt-get install virtualenv -y
virtualenv -p python3 venv

# 3. Activate the virtual environment.
source venv/bin/activate

# 4. Navigate to your project directory and install dependencies.
pip install -r requirements.txt

# 5. Run the application:
python main.py
- In Cloud Shell, click Web preview (
) > Preview on port 8080 to preview the application.
Result:
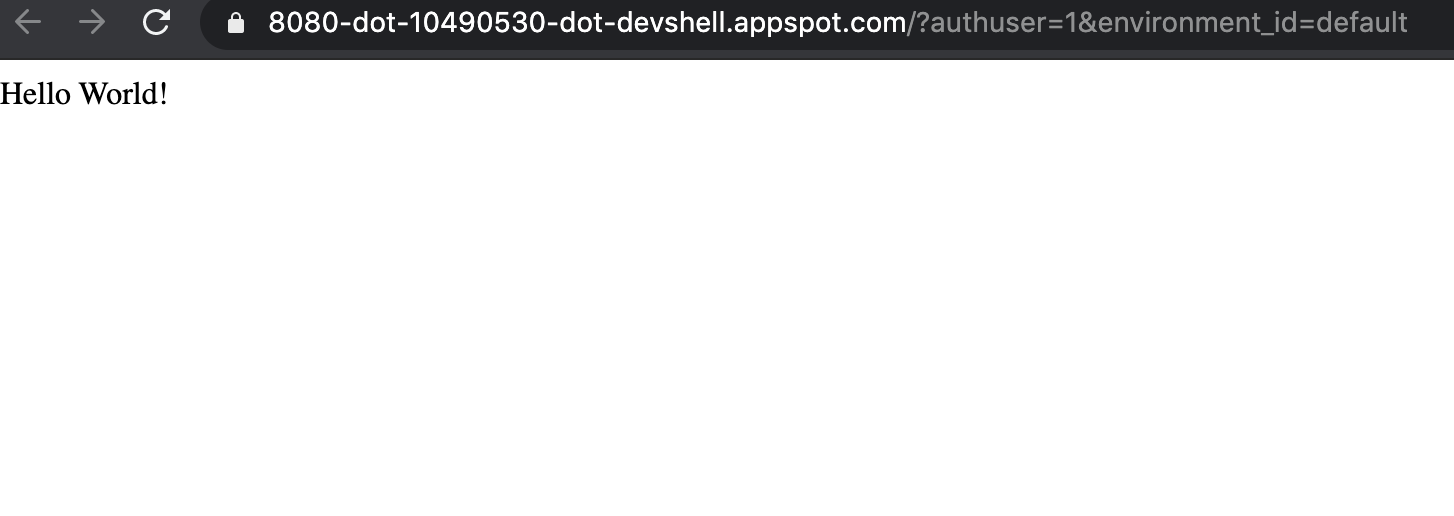
To end the test, return to Cloud Shell and press Ctrl+C to abort the deployed service.
Using the Cloud Console, verify that the app is not deployed.
- In the Cloud Console, on the Navigation menu > click App Engine > Dashboard.
- Notice that no resources are deployed.
Task 3: Deploy and run Hello World on App Engine
deploy your application to the App Engine Standard environment:
1
2
3
4
5
6
7
8
9
10
11
12
13
14
15
16
17
# 1. Navigate to the source directory:
cd ~/python-docs-samples/appengine/standard_python3/hello_world
# 2. Deploy your Hello World application.
gcloud app deploy
# If prompted "Do you want to continue (Y/n)?", press `Y` and then `Enter`.
# This **app deploy** command uses the _app.yaml_ file to identify project configuration.
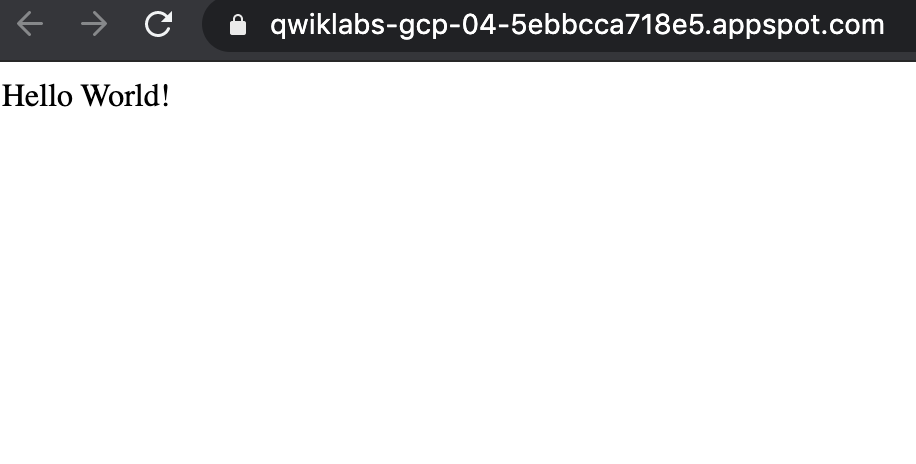
# 3. Launch your browser to view the app at https://YOUR\_PROJECT\_ID.appspot.com
gcloud app browse
# Did not detect your browser. Go to this link to view your app:
# https://qwiklabs-gcp-01-cb45b5df9cfb.uc.r.appspot.com
# Copy and paste the URL into a new browser window.
- Result:
Task 4: Disable the application
App Engine offers no option to Undeploy an application. After an application is deployed, it remains deployed, although you could instead replace the application with a simple page that says something like “not in service.” However, you can disable the application, which causes it to no longer be accessible to users.
Cloud Console,> Navigation menu > click App Engine > Settings.
Click Disable application.
- Read the dialog message.
- Enter the App ID and click DISABLE.
- If you refresh the browser window you used to view to the application site, you’ll get a 404 error.

lab6 - Google Cloud Fundamentals: Deployment Manager and Cloud Monitoring
- Create a Deployment Manager deployment.
- Update a Deployment Manager deployment.
- use it to maintain a consistent state of your deployment
- View the load on a VM instance using Cloud Monitoring.
Task 1: Sign in to the Google Cloud Platform (GCP) Console
Task 2: Confirm that needed APIs are enabled
- GCP Console, on the Navigation menu > click APIs & services
- confirm that these APIs are enabled:
- Cloud Deployment Manager v2 API
- Cloud Runtime Configuration API
- Cloud Monitoring API
- confirm that these APIs are enabled:
If one or more APIs is missing, click the Enable APIs and Services button at top. Search for the above APIs by name and enable each for your current project. (You noted the name of your GCP project above.)
Task 3: Create a Deployment Manager deployment
- GCP console > Open Cloud Shell button > Continue
1
2
3
4
5
6
7
8
9
10
11
12
13
14
15
16
17
18
19
20
21
22
23
24
25
26
27
28
29
30
31
32
33
34
35
36
37
38
39
40
41
42
43
44
45
46
47
48
49
50
51
52
53
# place the zone that Qwiklabs assigned you to into an environment variable called MY\_ZONE.
export MY_ZONE=us-central1-a


# download an editable Deployment Manager template:
gsutil cp gs://cloud-training/gcpfcoreinfra/mydeploy.yaml mydeploy.yaml


# use the sed command to
# replace the `PROJECT_ID` placeholder string with your Google Cloud Platform project ID
sed -i -e "s/PROJECT_ID/$DEVSHELL_PROJECT_ID/" mydeploy.yaml

# replace the `ZONE` placeholder string with your Google Cloud Platform zone
sed -i -e "s/ZONE/$MY_ZONE/" mydeploy.yaml

# View the `mydeploy.yaml` file, with your modifications, with this command:
cat mydeploy.yaml


# The file will look something like this:
resources:
- name: my-vm
  type: compute.v1.instance
  properties:
    zone: us-central1-a
    machineType: zones/us-central1-a/machineTypes/n1-standard-1
    metadata:
      items:
      - key: startup-script
        value: "apt-get update"
    disks:
    - deviceName: boot
      type: PERSISTENT
      boot: true
      autoDelete: true
      initializeParams:
        sourceImage: https://www.googleapis.com/compute/v1/projects/debian-cloud/global/images/debian-9-stretch-v20201216
    networkInterfaces:
    - network: https://www.googleapis.com/compute/v1/projects/qwiklabs-gcp-00-45b1c5d64828/global/networks/default
      accessConfigs:
      - name: External NAT
        type: ONE_TO_ONE_NAT


# Build a deployment from the template:
gcloud deployment-manager deployments create my-first-depl \
    --config mydeploy.yaml
# When the deployment operation is complete
# the **gcloud** command displays a list of the resources named in the template and their current state.
# NAME   TYPE                 STATE      ERRORS  INTENT
# my-vm  compute.v1.instance  COMPLETED  []
- Confirm that the deployment was successful.
- In the GCP Console, on the Navigation menu > click Compute Engine > VM instances
- see that a VM instance called my-vm has been created
- Click on the VM instance’s name to open its VM instance details screen.
- Custom metadata section
- Confirm that the startup script you specified in your Deployment Manager template has been installed.
Task 4: Update a Deployment Manager deployment
- Return to your Cloud Shell prompt.
1
2
3
4
5
6
7
8
9
10
11
12
13
# Launch the `nano` text editor to edit the **mydeploy.yaml** file:
nano mydeploy.yaml

# Find the line that sets the value of the startup script
"apt-get update; apt-get install nginx-light -y"

# Press **Ctrl+O** and then press **Enter** to save your edited file.
# Press **Ctrl+X** to exit the **nano** text editor.


# let Deployment Manager to update the deployment to install the new startup script:
gcloud deployment-manager deployments update my-first-depl \
    --config mydeploy.yaml
- GCP console > Navigation menu > click Compute Engine > VM instances
- Click on the my-vm VM instance’s name to open its VM instance details pane
- Custom metadata section.
- Confirm that the startup script has been updated to the value you declared in your Deployment Manager template.
Task 5: View the Load on a VM using Cloud Monitoring
GCP Console > Navigation menu > click Compute Engine > VM instances.
- Select the checkbox for my-vm and click on STOP.
- Click on STOP again to confirm.
- Click on the VM instance’s name to open its VM instance details screen.
- Click on EDIT (pencil icon).
- Scroll down to the bottom of the page
- Service account dropdown.
- select Compute Engine default service account
- Access scopes.
- Select Allow full access to all Cloud APIs
- Click on Save.
restart the VM by clicking on Start at the top of the VM instance details screen page.
Click on START again to confirm.
GCP Console > Navigation menu > click Compute Engine > VM instances.
- To open a command prompt on the my-vm instance
- click SSH in its row in the VM instances list.
- In the ssh session on my-vm, execute this command to create a CPU load:
1
2
dd if=/dev/urandom | gzip -9 >> /dev/null &
# This Linux pipeline forces the CPU to work on compressing a continuous stream of random data.
Leave the window containing your SSH session open while you proceed with the lab.
Create a Monitoring workspace
You will now setup a Monitoring workspace that’s tied to your Qwiklabs GCP Project. The following steps create a new account that has a free trial of Monitoring.
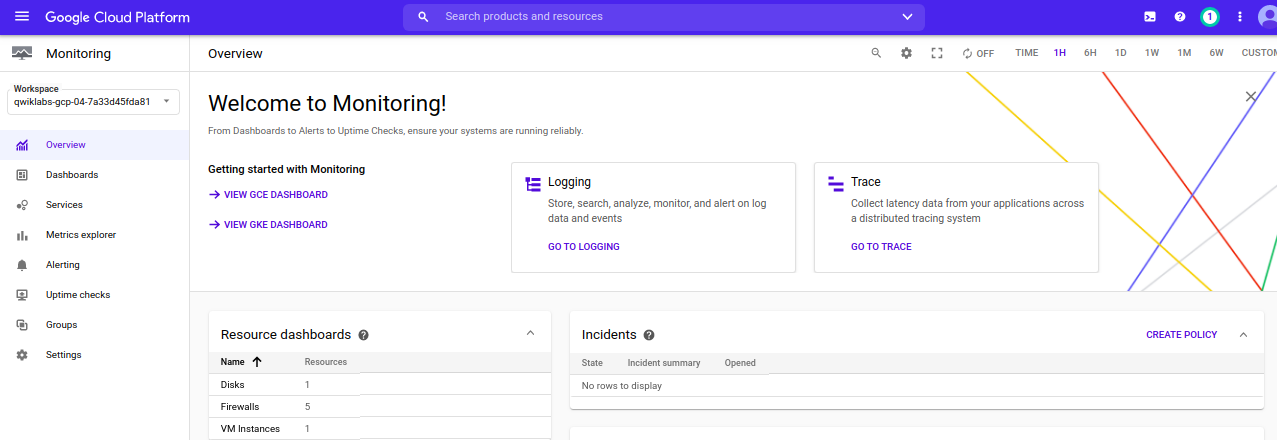
Google Cloud Platform Console > Navigation menu > Monitoring.
- When the Monitoring dashboard opens, your workspace is ready.
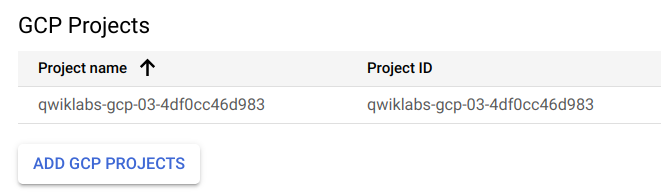
- Click on Settings option
- confirm that the GCP project which Qwiklabs created for you is shown under the GCP Projects section.
- Run the commands shown on screen in the SSH window of your VM instance to install both the Monitoring and Logging agents.
1
2
3
4
5
curl -sSO https://dl.google.com/cloudagents/install-monitoring-agent.sh
sudo bash install-monitoring-agent.sh

curl -sSO https://dl.google.com/cloudagents/install-logging-agent.sh
sudo bash install-logging-agent.sh
- Once both of the agents have been installed on your project’s VM,
- click Metrics Explorer under the main Cloud Monitoring menu on the far left.
- In the Metric pane of Metrics Explorer, select the resource type VM instance and the metric CPU usage.
- In the resulting graph, notice that CPU usage increased sharply a few minutes ago.

Terminate your workload generator.
- Return to your ssh session on my-vm and enter this command:
1
kill %1
lab7 - Google Cloud Fundamentals: BigQuery
- Load data from Cloud Storage into BigQuery.
load a web server log into a BigQuery table
- Perform a query on the data in BigQuery.
- query it using the BigQuery web user interface and the BigQuery CLI
Task 1: Sign in to the Google Cloud Platform (GCP) Console
Task 2: Load data from Cloud Storage into BigQuery
Google Console > Navigation menu > click BigQuery > click Done.
- Create a new dataset within your project
- selecting your project in the Resources section, then clicking on CREATE DATASET on the right.
- for Dataset ID, type logdata.
- For Data location, select the continent closest to the region your project was created in.
- click Create dataset.
- Create a new table in the logdata to store the data from the CSV file.
- Click on Create Table.
- the Source section:
- choose select Google Cloud Storage, and in the field, type
gs://cloud-training/gcpfci/access_log.csv. - Verify File format is set to CSV.
- choose select Google Cloud Storage, and in the field, type
- Note: When you have created a table previously, the Create from Previous Job option allows you to quickly use your settings to create similar tables.
- In the Destination section:
- For Dataset name, leave logdata selected.
- For Table name, type accesslog.
- For Table type, Native table should be selected.
- Under Schema section
- for Auto detect check the Schema and input Parameters.
- Accept the remaining default values and click Create Table.
- BigQuery creates a load job to create the table and upload data into the table (this may take a few seconds).
(Optional) To track job progress, click Job History.
When the load job is complete, click logdata > accesslog.
- On the table details page
- click Details to view the table properties
- click Preview to view the table data.
Each row in this table logs a hit on a web server. The first field, string_field_0, is the IP address of the client. The fourth through ninth fields log the day, month, year, hour, minute, and second at which the hit occurred. In this activity, you will learn about the daily pattern of load on this web server.
Task 3: Perform a query on the data using the BigQuery web UI
use the BigQuery web UI to query the accesslog table you created previously.
In the Query editor window, type (or copy-and-paste) the following query:
Because you told BigQuery to automatically discover the schema when you load the data, the hour of the day during which each web hit arrived is in a field called int_field_6.
select int64_field_6 as hour, count(*) as hitcount from logdata.accesslog group by hour order by hour
Notice that the Query Validator tells you that the query syntax is valid (indicated by the green check mark) and indicates how much data the query will process. The amount of data processed allows you to determine the price of the query using the Cloud Platform Pricing Calculator.
- Click Run and examine the results.
Task 4: Perform a query on the data using the bq command
use the bq command in Cloud Shell to query the accesslog table you created previously.
- Google Cloud Platform Console > click Activate Cloud Shell > click Continue.
1
2
3
4
5
6
7
8
9
10
11
12
13
bq query "select string_field_10 as request, count(*) as requestcount from logdata.accesslog group by request order by requestcount desc"
# Waiting on bqjob_r22b5bce3efe1ba12_000001778e4a262f_1 ... (0s) Current status: DONE
# |                request                 | requestcount |
# | GET /store HTTP/1.0                    |       337293 |
# | GET /index.html HTTP/1.0               |       336193 |
# | GET /products HTTP/1.0                 |       280937 |
# | GET /services HTTP/1.0                 |       169090 |
# | GET /products/desserttoppings HTTP/1.0 |        56580 |
# | GET /products/floorwaxes HTTP/1.0      |        56451 |
# | GET /careers HTTP/1.0                  |        56412 |
# | GET /services/turnipwinding HTTP/1.0   |        56401 |
# | GET /services/spacetravel HTTP/1.0     |        56176 |
# | GET /favicon.ico HTTP/1.0              |        55845 |
Kubernetes Lab
Lab for Architecting with Google Kubernetes Engine: Foundations
lab1 - Accessing the Google Cloud Console and Cloud Shell
Learn how to access the Google Cloud Console and Cloud Shell
Become familiar with the Google Cloud Console
Become familiar with Cloud Shell features, including the Cloud Shell code editor
Use the Google Cloud Console and Cloud Shell to create buckets and VMs and service accounts
Perform other commands in Cloud Shell
Task 0. Lab Setup
Task 1. Explore the Google Cloud Console
Cloud Storage: create a bucket
Cloud Storage buckets must have a globally unique name. easily get a unique name for our bucket by using the ID of the Google Cloud project that Qwiklabs created for us, because Google Cloud project IDs are also globally unique.
- Google Cloud Console > Storage > Browser.
- Click Create bucket.
- For Name, paste in the Google Cloud project ID string you copied in an earlier step.
- Leave all other values as their defaults.
- Click Create.

The Google Cloud Console has a Notifications (
) icon. Feedback from the underlying commands is sometimes provided there. You can click the icon to check the notifications for additional information and history.
Create a virtual machine (VM) instance
- click Compute Engine > VM instances.
- Click Create Instance.
- For Name:
first-vm - For Region:
us-central1. - For Zone:
us-central1-c. - For Machine type, examine the options.
- The Machine type: menu lists the number of virtual CPUs, the amount of memory, and a symbolic name such as e1-standard-1.
- The symbolic name is the parameter you use to select the machine type when using the
gcloudcommand to create a VM. - To the right of the region, zone, and machine type is a per-month estimated cost.
- To see the breakdown of estimated costs, click Details to the right of the Machine type list underneath the estimated costs.
- For Machine type, click 2 vCPUs (e2-standard-2)
- For Machine type, click e2-micro (2 shared vCPU).
- The micro type is a shared-core VM that is inexpensive.
- For Firewall, click Allow HTTP traffic.
- For Name:
- Leave the remaining settings as their defaults, and click Create.
Explore the VM details
- VM instances page, click
first-vm. - Locate CPU platform, click Edit.
- can’t change the machine type, the CPU platform, or the zone of a running Google Cloud VM.
- can add network tags and allow specific network traffic from the internet through firewalls.
- can add disks, determine whether the boot disk is deleted when the instance is deleted.
- Scroll down and examine
- Click Cancel.
Create an IAM service account
IAM & admin > Service accounts.
- Click + Create service account.
- Service account details page,
- Service account name:
test-service-account. - Click Create.
- Service account name:
- Service account permissions page
- role as Project > Editor.
- Click Continue.
Click Done.
- Service accounts >
test-service-account> click three dotsAction.- Click Create Key.
- Select JSON as the key type.
- Click Create.
- Click Close.
Task 2. Explore Cloud Shell
Open Cloud Shell and explore its features
click Activate Cloud Shell > click Continue.
Hide/Restore: This icon hides and restores the window, giving you full access to the Google Cloud Console without closing Cloud Shell.
Open in new window: Having Cloud Shell at the bottom of the Google Cloud Console is useful when you are issuing individual commands. But when you edit files or want to see the full output of a command, clicking this icon displays Cloud Shell in a full-sized terminal window.
Close all tabs: This icon closes Cloud Shell. Every time you close Cloud Shell, the virtual machine is recycled and all machine context is lost. However, data that you stored in your home directory is still available to you the next time you start Cloud Shell.
Use Cloud Shell to set up the environment variables
use the following commands to define the environment variables used in this task.
- Replace [BUCKET_NAME] with the name of the first bucket from task 1.
- Replace [BUCKET_NAME_2] with a globally unique name.
1
2
3
MY_BUCKET_NAME_1=qwiklabs-gcp-03-529929a89c8f
MY_BUCKET_NAME_2=qwiklabs-gcp-03-529929a89c8f_2
MY_REGION=us-central1
Move the credentials file into Cloud Shell
You downloaded a JSON-encoded credentials file in an earlier task when you created your first Cloud IAM service account.
- On your local workstation
- locate the JSON key
- rename the file to
credentials.json.
In Cloud Shell, click the three dots (
) icon
- Click Upload file
- upload the
credentials.jsonfile to the Cloud Shell VM.
- upload the
- In Cloud Shell, type ls to confirm that the file was uploaded.
Create a second Cloud Storage bucket
- In Cloud Shell
- use the
gsutilcommand to create a bucket. gsutil mb gs://$MY_BUCKET_NAME_2
- use the
- Google Cloud Console > Storage > Browser > click Refresh if you are already in the Storage Browser.
- The second bucket should appear in the Buckets list.
Use the gcloud command line to create a second virtual machine
- create the VM
1
2
3
4
5
6
7
8
9
10
11
12
13
14
15
16
17
18
19
20
21
22
23
24
25
26
27
28
29
30
31
# 1. to list all the zones in a given region:
gcloud compute zones list | grep $MY_REGION


# 2. Select a zone from the first column of the list.

# 3. store your chosen zone in an environment variable.
MY_ZONE=us-central1-c

# 4. Set this zone to be your default zone by executing the following command.
gcloud config set compute/zone $MY_ZONE


# 5. store a name in an environment variable you will use to create a VM.
MY_VMNAME=second-vm


# 6. Create a VM in the default zone that you set earlier in this task using the new environment variable to assign the VM name.
gcloud compute instances create $MY_VMNAME \
  --machine-type "e2-standard-2" \
  --image-project "debian-cloud" \
  --image-family "debian-9" \
  --subnet "default"


# 7. List the virtual machine instances in your project.
gcloud compute instances list
# both your newly created and your first virtual machine in the list.
# NAME       ZONE           MACHINE_TYPE   PREEMPTIBLE  INTERNAL_IP  EXTERNAL_IP    STATUS
# first-vm   us-central1-c  e2-micro                    10.128.0.2   35.239.43.203  RUNNING
# second-vm  us-central1-c  e2-standard-2               10.128.0.3   35.226.88.66   RUNNING
- Google Cloud Console > Navigation menu , click Compute Engine > VM Instances.
- see both of the virtual machines created.
- Look at the
External IPcolumn.- the external IP address of the first VM you created is shown as a link. (If necessary, click the
HIDE INFO PANELbutton to reveal theExternal IPcolumn.) - The Google Cloud Console offers the link because you configured this VM’s firewall to allow HTTP traffic.
- the external IP address of the first VM you created is shown as a link. (If necessary, click the
- Click the link you found in your VM’s
External IPcolumn.- Your browser will present a
Connection refusedmessage in a new browser tab. - This message occurs because, although there is a firewall port open for HTTP traffic to your VM, no Web server is running there.
- Close the browser tab you just created.
- Your browser will present a
create a second service account
- In Cloud Shell
1
2
3
4
5
6
7
# create a new service account:
gcloud iam service-accounts create test-service-account2 \
   --display-name "test-service-account2"


# If you see the following output, type **y** and press **ENTER**:
# API [iam.googleapis.com] not enabled on project [560255523887]. Would you like to enable and retry (this will take a few minutes)? (y/N)?
- Google Cloud Console > IAM & admin > Service accounts.
- Refresh the page till you see test-service-account2.
1
2
3
4
5
6
# to grant the second service account the Project viewer role:
gcloud projects add-iam-policy-binding $GOOGLE_CLOUD_PROJECT \
   --member serviceAccount:test-service-account2@${GOOGLE_CLOUD_PROJECT}.iam.gserviceaccount.com \
   --role roles/viewer

# `GOOGLE_CLOUD_PROJECT` is an environment variable that is automatically populated in Cloud Shell and is set to the project ID of the current context.
- Google Cloud Console > IAM & admin > IAM.
- Select the new service account called test-service-account2.
- right hand side of the page, click on pencil icon and expand the Viewer role.
- see test-service-account2 listed as a member of the Viewer role.
Task 3. Work with Cloud Storage in Cloud Shell
Download a file to Cloud Shell and copy it to Cloud Storage
1
2
3
4
5
6
7
8
9
10
# 1. Copy a picture of a cat from a Google-provided Cloud Storage bucket to your Cloud Shell.
gsutil cp gs://cloud-training/ak8s/cat.jpg cat.jpg


# 2. Copy the file into one of the buckets that you created earlier.
gsutil cp cat.jpg gs://$MY_BUCKET_NAME_1


# 3. Copy the file from the first bucket into the second bucket:
gsutil cp gs://$MY_BUCKET_NAME_1/cat.jpg gs://$MY_BUCKET_NAME_2/cat.jpg
- Google Cloud Console > Storage > Browser
- select the buckets that you created, and verify that both contain the
cat.jpgfile.
- select the buckets that you created, and verify that both contain the
Set the access control list for a Cloud Storage object
1
2
3
4
5
6
7
8
9
10
11
12
13
14
15
16
17
18
19
20
21
22
23
24
25
26
27
28
29
30
31
32
33
34
35
36
37
38
39
40
41
42
43
44
45
46
47
48
49
50
51
52
53
54
# 1. To get the default access list that's been assigned to `cat.jpg`
gsutil acl get gs://$MY_BUCKET_NAME_1/cat.jpg  > acl.txt
cat acl.txt
# output shows that anyone with a Project Owner, Editor, or Viewer role for the project has access (Owner access for Owners/Editors and Reader access for Viewers).
#   [
#   {
#     "entity": "project-owners-560255523887",
#     "projectTeam": {
#     "projectNumber": "560255523887",
#     "team": "owners"
#     },
#   gsutil cp gs://cloud-training/ak8s/cat.jpg cat.jpg  "role": "OWNER"
#   },
#   {
#     "entity": "project-editors-560255523887",
#     "projectTeam": {
#     "projectNumber": "560255523887",
#     "team": "editors"
#     },
#     "role": "OWNER"
#   },
#   {
#     "entity": "project-viewers-560255523887",
#     "projectTeam": {
#     "projectNumber": "560255523887",
#     "team": "viewers"
#     },
#     "role": "READER"
#   },
#   {
#     "email": "google12345678_student@qwiklabs.net",
#     "entity": "user-google12345678_student@qwiklabs.net",
#     "role": "OWNER"
#   }
#   ]


# 2. To change the object to have private access, execute the following command:
gsutil acl set private gs://$MY_BUCKET_NAME_1/cat.jpg


# 3. To verify the new ACL that's been assigned to `cat.jpg`, execute the following two commands:
gsutil acl get gs://$MY_BUCKET_NAME_1/cat.jpg  > acl-2.txt
cat acl-2.txt


# The output should look similar to the following example. Now only the original creator of the object (your lab account) has Owner access.
  [
  {
    "email": "google12345678_student@qwiklabs.net",
    "entity": "user-google12345678_student@qwiklabs.net",
    "role": "OWNER"
  }
  ]
Authenticate as a service account in Cloud Shell
- In Cloud Shell
1
2
3
4
5
6
7
8
9
10
11
12
13
14
15
16
17
18
19
20
21
22
23
24
25
26
27
28
29
30
31
32
33
34
35
36
37
38
39
40
41
42
43
44
45
46
47
48
49
50
51
52
53
54
55
56
57
58
59
60
61
62
63
64
65
66
67
68
69
70
71
72
73
74
75
76
77
78
79
80
81
82
83
84
# 1. execute the following command to view the current configuration:
gcloud config list
# output
#   [component_manager]
#   disable_update_check = True
#   [compute]
#   gce_metadata_read_timeout_sec = 5
#   zone = us-central1-a
#   [core]
#   account = google12345678_student@qwiklabs.net
#   disable_usage_reporting = False
#   project = qwiklabs-Google Cloud-1aeffbc5d0acb416
#   [metrics]
#   environment = devshell
#   Your active configuration is: [cloudshell-16441]


# 2. change the authenticated user to the first service account through the credentials uploaded into Cloud Shell (`credentials.json`).
gcloud auth activate-service-account --key-file credentials.json
# Cloud Shell is now authenticated as `test-service-account`.


# 3. To verify the active account, execute the following command:
gcloud config list
# output
# The account is now set to the `test-service-account` service account.
#   [component_manager]
#   disable_update_check = True
#   [compute]
#   gce_metadata_read_timeout_sec = 5
#   zone = us-central1-a
#   [core]
#   account = test-service-account@qwiklabs-Google Cloud-1aeffbc5d0acb416.iam.gserviceaccount.com
#   disable_usage_reporting = False
#   project = qwiklabs-Google Cloud-1aeffbc5d0acb416
#   [metrics]
#   environment = devshell
#   Your active configuration is: [cloudshell-16441]


# 4. To verify the list of authorized accounts in Cloud Shell, execute the following command:
gcloud auth list
# **Output**
#                               Credentialed Accounts
# ACTIVE  ACCOUNT
#         student-03-8f6a8a61dece@qwiklabs.net
# *     test-service-account@qwiklabs-gcp-03-529929a89c8f.iam.gserviceaccount.com
# To set the active account, run:
#     $ gcloud config set account `ACCOUNT`


# 5. To verify that the current account (`test-service-account`) cannot access the `cat.jpg` file in the first bucket
gsutil cp gs://$MY_BUCKET_NAME_1/cat.jpg ./cat-copy.jpg
# Because you restricted access to this file to the owner earlier in this task you should see output that looks like the following example.
# **Output**
#   Copying gs://test-bucket-123/cat.jpg...
#   AccessDeniedException: 403  KiB]


# 6. Verify that the current account (`test-service-account`) can access the `cat.jpg` file in the second bucket that you created:
gsutil cp gs://$MY_BUCKET_NAME_2/cat.jpg ./cat-copy.jpg
# **Output**
#   Copying gs://test-bucket-123/cat.jpg...
#   - [1 files][ 81.7 KiB/ 81.7 KiB]
#   Operation completed over 1 objects/81.7 KiB.


# 7. To switch to the lab account, execute the following command.
# replace `[USERNAME]` with the username provided in the Qwiklabs Connection Details pane left of the lab instructions page. .
gcloud config set account student-03-8f6a8a61dece@qwiklabs.net


# 8. To verify that you can access the `cat.jpg` file in the [BUCKET_NAME] bucket (the first bucket that you created), execute the following command.
gsutil cp gs://$MY_BUCKET_NAME_1/cat.jpg ./copy2-of-cat.jpg
# The lab account created the bucket and object and remained an Owner when the object access control list (ACL) was converted to private, so the lab account can still access the object.
# **Output**
#   Copying gs://test-bucket-123/cat.jpg...
#   - [1 files][ 81.7 KiB/ 81.7 KiB]
#   Operation completed over 1 objects/81.7 KiB.


# 9. Make the first Cloud Storage bucket readable by everyone, including unauthenticated users.
gsutil iam ch allUsers:objectViewer gs://$MY_BUCKET_NAME_1
# This is an appropriate setting for hosting public website content in Cloud Storage.
- Google Cloud Console > Storage > Browser,
- select the first storage bucket that you created. Notice that the
cat.jpgfile has aPublic link. Copy this link.
- select the first storage bucket that you created. Notice that the
- Open an incognito browser tab and paste the link into its address bar.
- see a picture of a cat.
- Leave this browser tab open.
Task 4. Explore the Cloud Shell code editor
Open the Cloud Shell code editor
- In Cloud Shell, click the Open in new window icon top right. Then click the pencil icon to open the Cloud Shell code editor.

- In Cloud Shell
1
2
3
4
5
# execute the following command to clone a `git` repository:
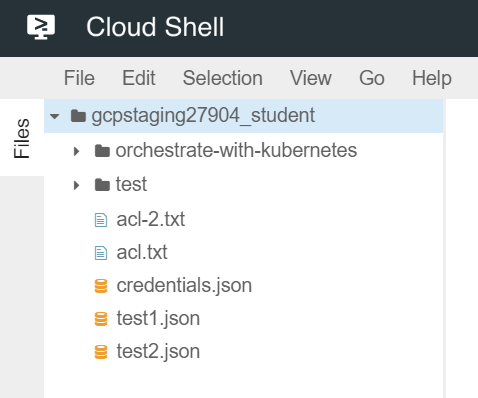
git clone https://github.com/googlecodelabs/orchestrate-with-kubernetes.git
# create a test directory:
mkdir test
- The
orchestrate-with-kubernetesfolder appears in the left pane of the Cloud Shell code editor window. - The
testfolder now appears in the left pane of the Cloud Shell code editor window.
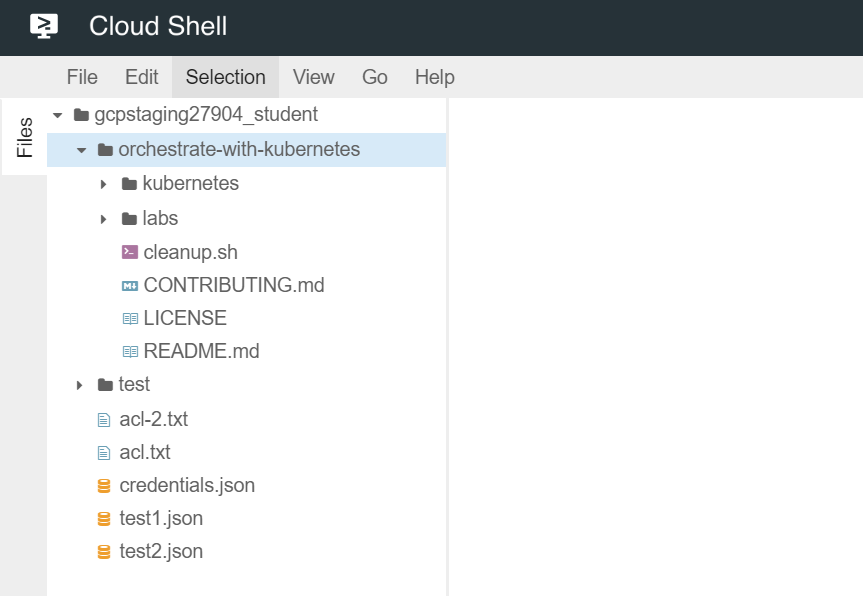
- In the Cloud Shell code editor, click the arrow to the left of
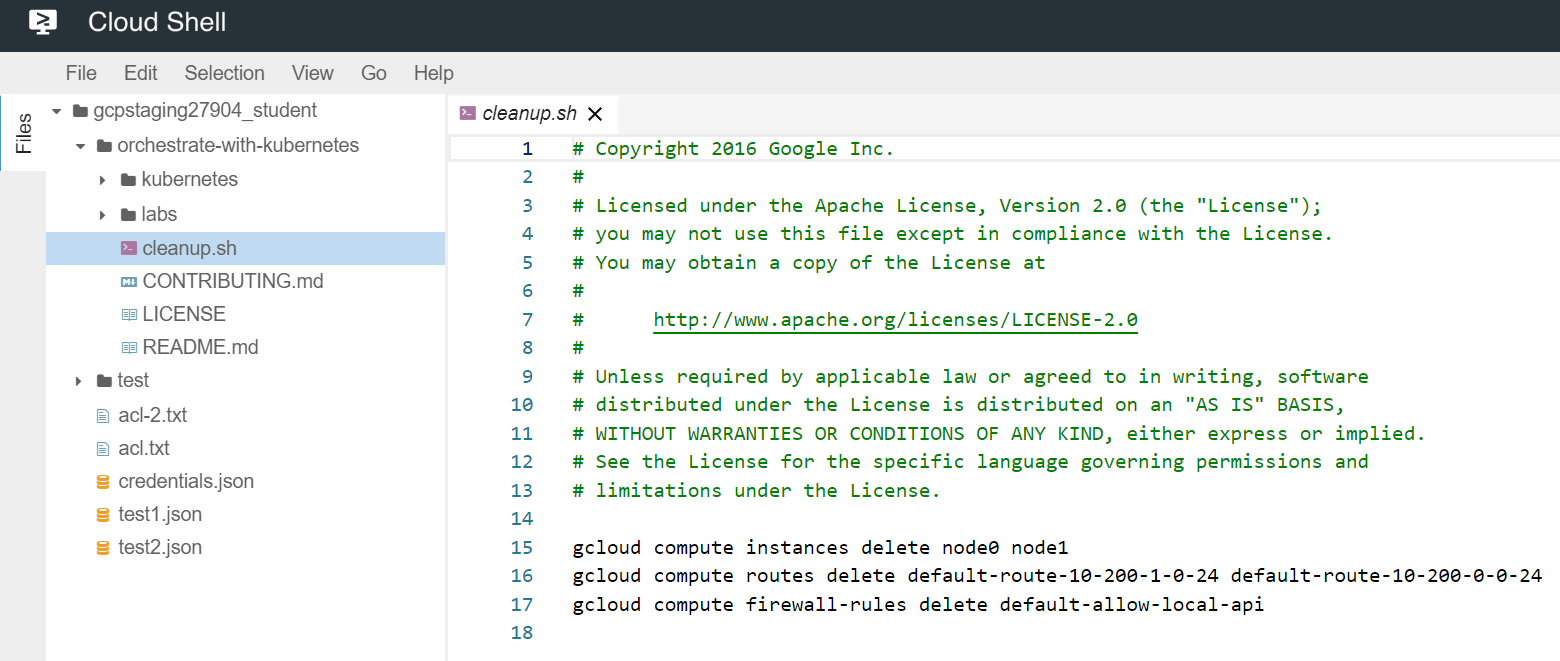
orchestrate-with-kubernetesto expand the folder. - Click the
cleanup.shfile to open it in the right pane of the Cloud Shell code editor window. - Add the following text as the last line of the
cleanup.shfile:echo Finished cleanup!
- In Cloud Shell
1
2
3
4
5
# execute the following commands to change directory
cd orchestrate-with-kubernetes

# display the contents of `cleanup.sh`
cat cleanup.sh
- In the Cloud Shell code editor, click to open the
Filemenu and chooseNew File.- Name the file
index.html.
- Name the file
- In the right hand pane, paste in this HTML text
1
2
3
4
5
6
7
8
9
10
11
12
13
14
15
<html><head><title>Cat</title></head>
<body>
<h1>Cat</h1>
<img alt="pic" src="REPLACE_WITH_CAT_URL">
</body></html>


<html><head><title>Cat</title></head>
<body>
<h1>Cat</h1>
<img alt="pic" src="https://storage.googleapis.com/qwiklabs-gcp-03-529929a89c8f/cat.jpg">
</body></html>


<!-- Replace the string `REPLACE_WITH_CAT_URL` with the URL of the cat image from an earlier task. The URL will look like this: -->
click Compute Engine > VM instances.
first VM, click the
SSHbutton.In the SSH login window, install the
nginxWeb server:
1
2
sudo apt-get update
sudo apt-get install nginx -y
- In your Cloud Shell window,
1
2
3
4
5
6
7
8
9
10
11
12
13
14
15
16
17
18
19
20
21
22
23
24
25
26
27
# copy the HTML file you created using the Code Editor to your virtual machine:
gcloud compute scp index.html first-vm:index.nginx-debian.html \
   --zone=us-central1-c

# If you are prompted whether to add a host key to your list of known hosts, answer **y**.

# If you are prompted to enter a passphrase, press the **Enter** key to respond with an empty passphrase.
# Press the **Enter** key again when prompted to confirm the empty passphrase.
# Generating public/private rsa key pair.
# Enter passphrase (empty for no passphrase):
# Enter same passphrase again:
# Your identification has been saved in /home/student-03-8f6a8a61dece/.ssh/google_compute_engine.
# Your public key has been saved in /home/student-03-8f6a8a61dece/.ssh/google_compute_engine.pub.
# The key fingerprint is:
# SHA256:6FS+lmJQZ/hVXAI47IvRLpVJUODu4Uk4R5csSGMbYVw student-03-8f6a8a61dece@first-vm
# The key's randomart image is:

# |   .BoE=...oo.. |
# |   +.* o=. ...  |
# |    o *+B+.     |
# |     =.X*.      |
# |    + B=S.      |
# |     Xoooo       |
# |      B.+        |
# |     . o         |
# |                 |
- In the SSH login window for your VM, copy the HTML file from your home directory to the document root of the
nginxWeb server:
1
sudo cp index.nginx-debian.html /var/www/html
- click Compute Engine > VM instances.
- Click the link in the
External IPcolumn for your first VM. - A new browser tab opens, containing a Web page that contains the cat image.
- Click the link in the
lab2 - Working with Cloud Build
- Use Cloud Build to build and push containers
- Use Container Registry to store and deploy containers
Task 0. Lab Setup
Task 1: Confirm that needed APIs are enabled
Google Cloud Console > Navigation menu > click APIs & Services.
Click Enable APIs and Services.
In the Search for APIs & Services box
- Cloud Build API,
ENABLE - Container Registry,
ENABLE
- Cloud Build API,
Task 2. Building Containers with DockerFile and Cloud Build
- Google Cloud Console > Activate Cloud Shell > Continue.
1
2
3
4
5
6
7
8
9
10
11
12
13
14
15
16
17
18
19
20
21
22
23
24
25
26
27
28
29
30
31
32
33
34
35
# Create an empty `quickstart.sh` file using the nano text editor.
nano quickstart.sh
#!/bin/sh
echo "Hello, world! The time is $(date)."
# Save the file and close nano by pressing the **CTRL+X** key, then press **Y** and **Enter**.


# Create an empty `Dockerfile` file using the nano text editor.
nano Dockerfile

FROM alpine
# use the Alpine Linux base image.
COPY quickstart.sh /
# adds the `quickstart.sh` script to the / directory in the image.
CMD ["/quickstart.sh"]
# execute the `/quickstart.sh` script when the associated container is created and run.

# to make the `quickstart.sh` script executable.
chmod +x quickstart.sh


# build the Docker container image in Cloud Build.
gcloud builds submit \
   --tag gcr.io/${GOOGLE_CLOUD_PROJECT}/quickstart-image .
# **Important**
# Don't miss the dot (".") at the end of the command.
# The dot specifies that the source code is in the current working directory at build time.


# When the build completes, your Docker image is built and pushed to Container Registry.
ID                                    CREATE_TIME                DURATION  SOURCE
            IMAGES                                                          STATUS
e52cca0d-6072-47d9-b3b1-721b4b98413c  2021-02-12T03:42:00+00:00  18S       gs://qwiklabs-gcp-00-49456f0372f9_cloudbuild/source/1613101317.916576-fc83f987943e40a19b0148c1c9
a30352.tgz  gcr.io/qwiklabs-gcp-00-49456f0372f9/quickstart-image (+1 more)  SUCCESS
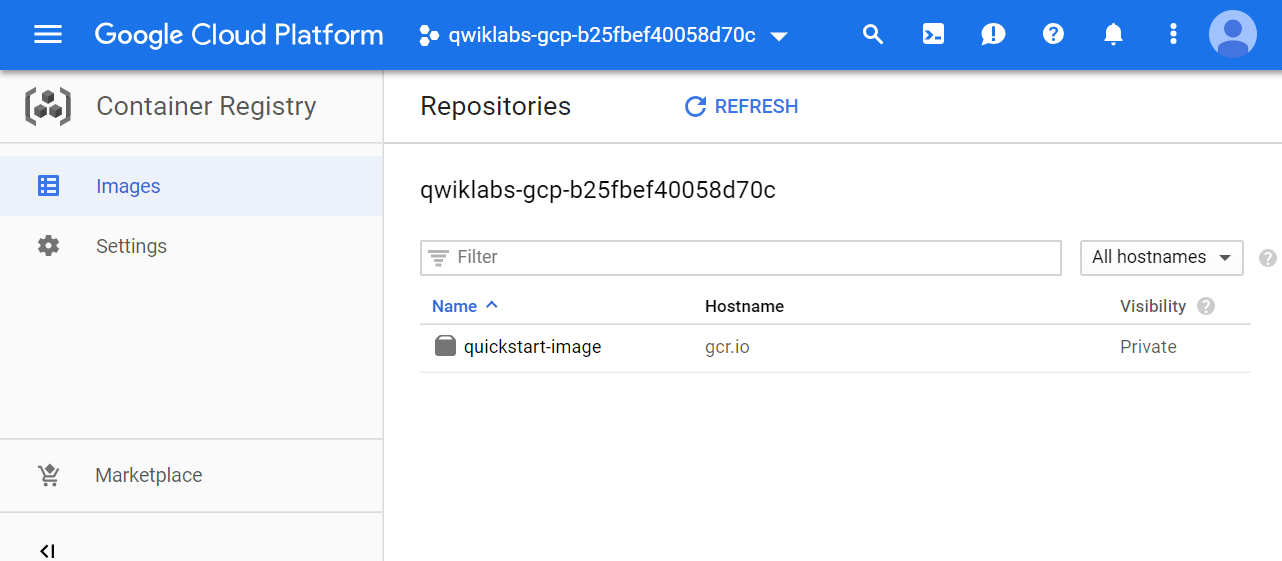
- Google Cloud Console > Navigation menu > click Container Registry > Images.
- The
quickstart-imageDocker image appears in the list
Task 3. Building Containers with a build configuration file and Cloud Build
Cloud Build also supports custom build configuration files. In this task you will incorporate an existing Docker container using a custom YAML-formatted build file with Cloud Build.
- In Cloud Shell
1
2
3
4
5
6
7
8
9
10
11
12
13
14
15
16
17
18
19
20
21
22
23
24
25
26
27
28
29
30
# to clone the repository to the lab Cloud Shell.
git clone https://github.com/GoogleCloudPlatform/training-data-analyst

# Create a soft link as a shortcut to the working directory.
ln -s ~/training-data-analyst/courses/ak8s/v1.1 ~/ak8s


# Change to the directory that contains the sample files for this lab.
cd ~/ak8s/Cloud_Build/a


# A sample custom cloud build configuration file called `cloudbuild.yaml` has been provided for you in this directory as well as copies of the `Dockerfile` and the `quickstart.sh` script you created in the first task.

# view the contents of `cloudbuild.yaml`.
cat cloudbuild.yaml
# steps:
# - name: 'gcr.io/cloud-builders/docker'
#   args: [ 'build', '-t', 'gcr.io/$PROJECT_ID/quickstart-image', '.' ]
# images:
# - 'gcr.io/$PROJECT_ID/quickstart-image'


# This file instructs Cloud Build to
# use Docker to build an image using the Dockerfile specification in the current local directory, tag it with `gcr.io/$PROJECT_ID/quickstart-image` and then push that image to Container Registry.


# start a Cloud Build using `cloudbuild.yaml` as the build configuration file:
gcloud builds submit --config cloudbuild.yaml .
# The build output to Cloud Shell should be the same as before.
# When the build completes, a new version of the same image is pushed to Container Registry.
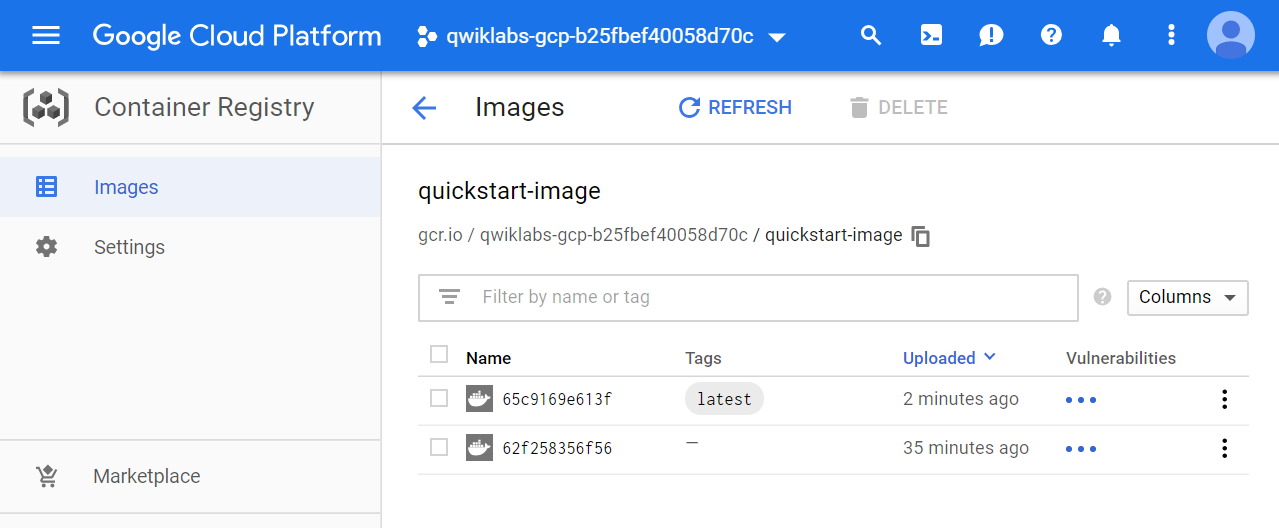
- Google Cloud Console > Navigation menu > click Container Registry > Images > click
quickstart-image.- Two versions of
quickstart-imageare now in the list.
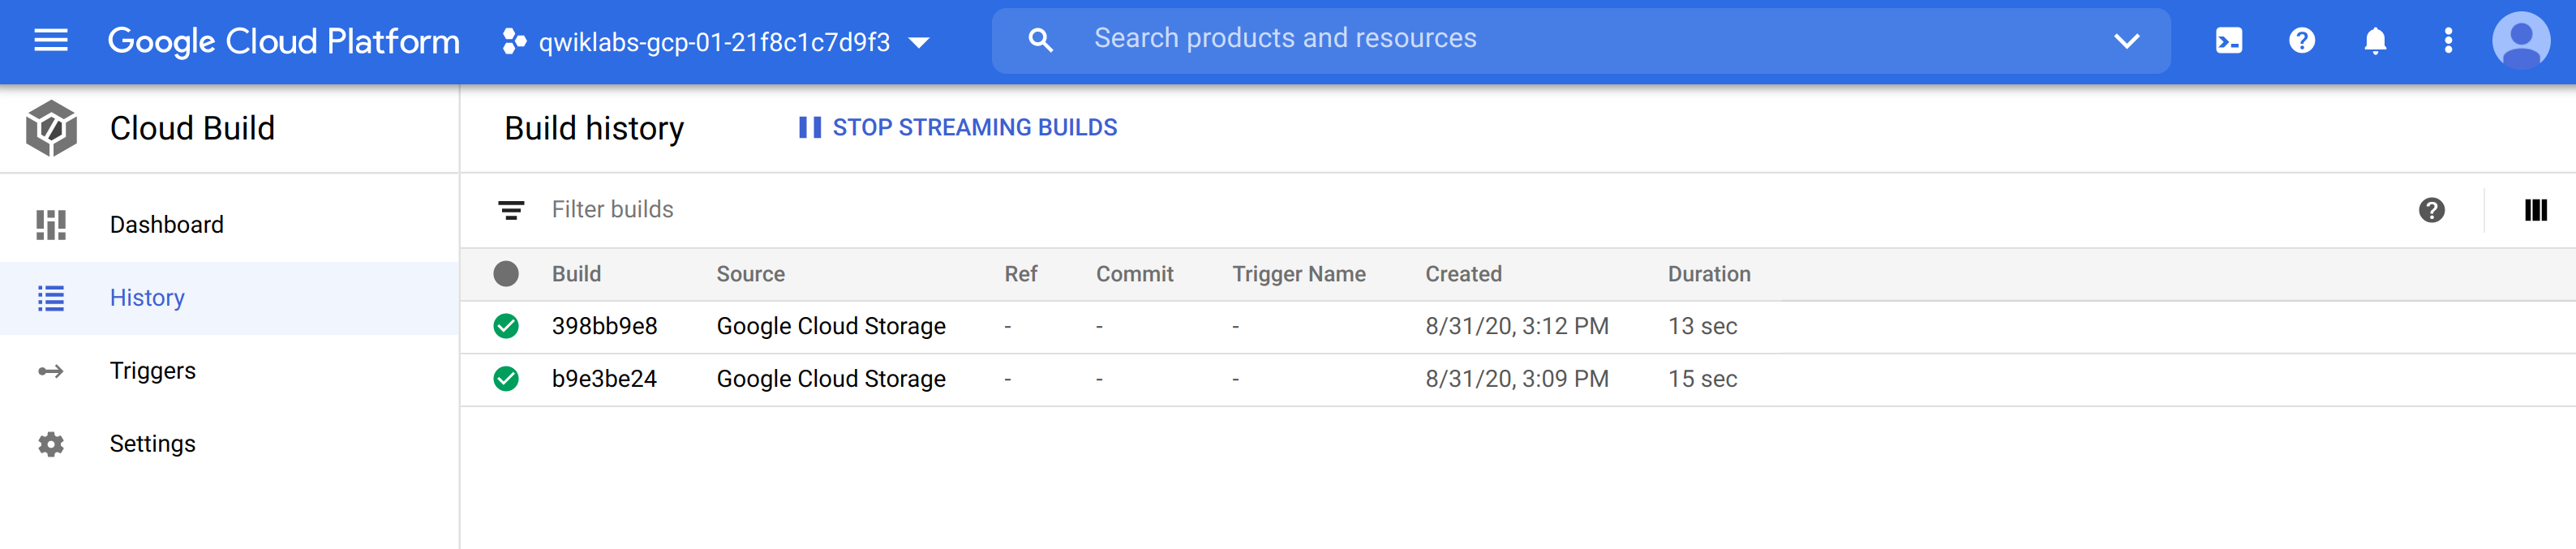
- Google Cloud Console > Navigation menu > click Cloud Build > History.
- Two builds appear in the list.
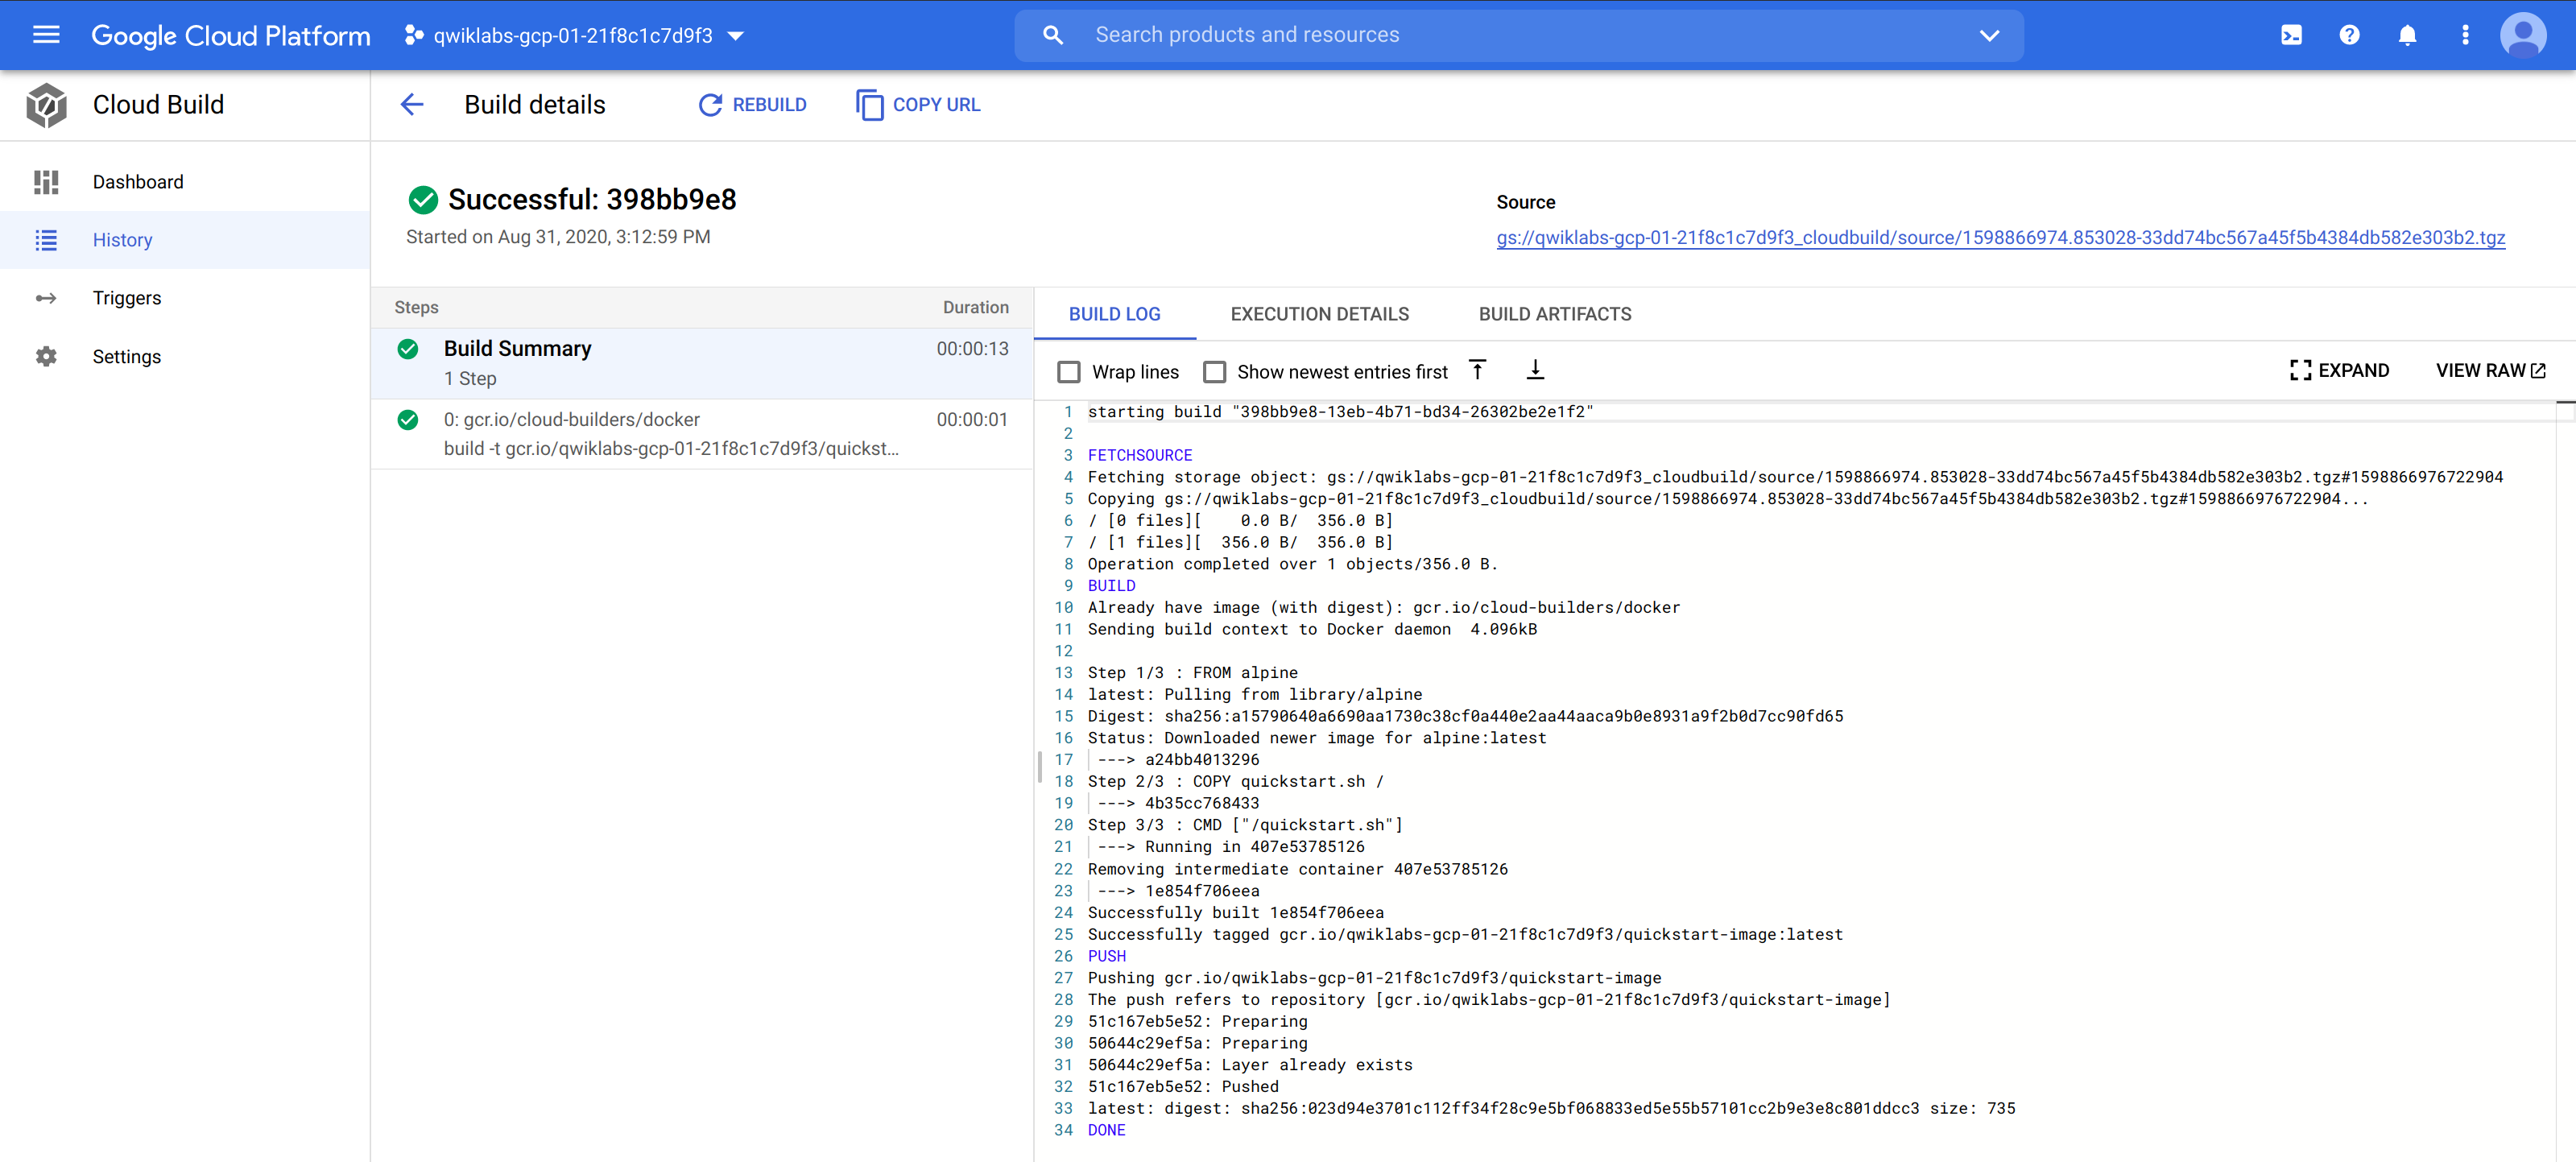
- Click the build ID for the build at the top of the list.
- The details of the build, including the build log, are displayed.
Task 4. Building and Testing Containers with a build configuration file and Cloud Build
- In Cloud Shell
1
2
3
4
5
6
7
8
9
10
11
12
13
14
15
16
17
18
19
20
21
22
23
24
25
26
27
28
29
30
31
32
33
34
35
36
37
38
39
40
41
42
43
44
45
46
47
48
49
# change to the directory that contains the sample files for this lab.
cd ~/ak8s/Cloud_Build/b

cat Dockerfile
# FROM alpine
# COPY quickstart.sh /
# CMD ["/quickstart.sh"]

cat quickstart.sh
# #!/bin/sh
# if [ -z "$1" ]
# then
#         echo "Hello, world! The time is $(date)."
#         exit 0
# else
#         exit 1
# fi

cat cloudbuild.yaml
# steps:
# - name: 'gcr.io/cloud-builders/docker'
#   args: [ 'build', '-t', 'gcr.io/$PROJECT_ID/quickstart-image', '.' ]
# - name: 'gcr.io/$PROJECT_ID/quickstart-image'
#   args: ['fail']
# images:
# - 'gcr.io/$PROJECT_ID/quickstart-image'


# In addition to its previous actions, this build configuration file runs the `quickstart-image` it has created.
# In this task, the `quickstart.sh` script has been modified so that it simulates a test failure when an argument `['fail']` is passed to it.


# start a Cloud Build using `cloudbuild.yaml` as the build configuration file:
gcloud builds submit \
   --config cloudbuild.yaml .
# **Output (do not copy)**
#     Finished Step #1
#     ERROR
#     ERROR: build step 1 "gcr.io/ivil-charmer-227922klabs-gcp-49ab2930eea05/quickstart-image" failed: exit status 127
#
#     ERROR: (gcloud.builds.submit) build f3e94c28-fba4-4012-a419-48e90fca7491 completed with status "FAILURE"


# 4. Confirm that your command shell knows that the build failed:
echo $?


# The command will reply with a non-zero value.
# If you had embedded this build in a script, your script would be able to act up on the build's failure.
Comments powered by Disqus.